
B2B login steps
Welcome to our B2B login step-by-step page, where we aim to guide and inspire you through various processes with clear and concise instructions. This page is designed to provide you with easy-to-follow steps that will help you accomplish your goals.
Step 1: Find the "B2B Login" button on the menu part, once you clicked in. Click create an account on the bottom.

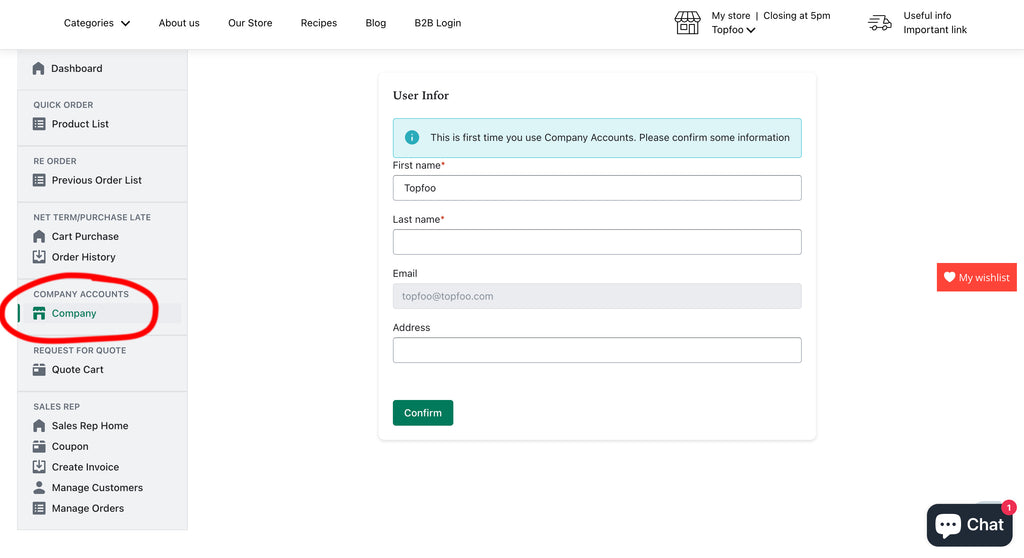
Step 2: After creating, go to the "Company" and confirm your information, make sure they are correct.
Step 3: After confirming, you can request to create a company profile to start buying from the store.
To request to create a new profile, click "Request to create company" button.

A form will show up, you should enter the information that matches your company. After filling in all the information needed, click "Send request" to send it to us.
Note: You can edit your company information in the request if needed.
Step 4: After being approved, you can start creating new roles, adding more members, and placing company orders.

By default, there are 2 roles:
- Manager: The manager will have this role with full permission
- Default: The default role with no permission, members with this role only can create company orders.
To create a new role, click Add new role button.
A role has a name and a list of permissions. You can select what a member can do if he/she has the role. There are 3 kinds of permissions:
- Manage company orders: Members with this role can edit and delete company orders
- Manage roles: Members with this role can create, edit, and delete roles
- Manage members: Members with this role can invite, and remove members from the company


Then, the invited member can go to Portal to approve the request

After approval, the member will be listed in Company members section with the role selected.
As the Member :
When the company finish setting up their organization on the portal, they can start placing orders from the store.